

Let's face it, most balisongs come with a “stock” look and feel that we are all used to. Do you ever think that stock look gets a little boring? You might start to think that your knife looks and feels the exact same as thousands of other production models out there.
I’m here to let you know about a few ways you can spice up your butterfly knife all by yourself. Some of these will alter the look, some alter the feel, and others alter both. There are a lot of customization options out there and plenty of information available online on how to pull them off.
#1 Forced Blade Patina

Have you ever noticed the unique look of a worn survival knife or kitchen knife? The dark spots and interesting patterns that appear on knife blades after a lot of use is called a patina.
A patina usually forms on carbon steel knives and comes from the general aging of the steel. In simple terms, a patina is a thin layer of oxides that make a stain on the blade, but it is more controlled than typical rust and doesn’t spread or destroy your blade.
If you don't want to wait for a patina to naturally develop over time, you can actually force one to form on carbon steel. Different acidic materials and liquids can make different patterns and colors on the blade.
Mustard, vinegar, and coffee are all household materials you can use to force a patina on carbon steel. The higher the percent of carbon in your blade steel, the more effect a patina will have.
To put a patina on your knife, first clean it with isopropyl alcohol and a sponge to remove any oils. Once cleaned, rinse with water and dry with a microfiber cloth.
Then simply coat the blade with whatever material you're using and wait for the patina to form.
Depending on the type of steel this could take several hours, but keep a look out for any minor bubbling or black film, which indicates that the patina has formed. Rinse the blade with water and dry again, and that's all there is to it!
#2 Stonewash

One of the advantages of a stonewash finish is that it helps hide blade imperfections and blemishes that you don’t want to see. It also looks extremely cool and is a very popular finish on many types of knives.
Stonewashing is done by putting the blade into a rock tumbler for a few minutes, check on it every so often to see how apparent the finish is. If you are like most people, though, you probably don’t own your own rock tumbler.
Luckily, it is extremely easy to DIY a basic tumbling system. All you need is a plastic bottle with a large hole, a tumbling medium (rocks or pebbles), a splash of water, one drop of dish soap, and of course your blade!
Mimicking a rock tumbler is as easy as putting everything in the bottle and lightly shaking it in a circular motion. Doing this will also dull your blade, so you will want to re-sharpen it once it's done.
For a more dramatic effect you can also acid etch your blade before stonewashing it. You can also do this yourself, though you might not already have everything you need.
To prep the blade you'll need to clean it thoroughly and put tape or nail polish over any contact points. There are many different options for acids to use to etch the blade, but just make sure to take all necessary safety precautions before working with any dangerous chemicals.
The longer the blade stays in the acid the darker it will get, so make sure to keep an eye on it throughout the process. Once you've achieved the desired color make sure to clean all of the acid off of the blade before finishing with a stonewash.
#3 G10 Scale Dying

If you happen to have lighter colored g10 scales, then scale dying could be a great option for you to customize your butterfly knife. The only rule with scale dying is that you cannot dye a lighter color, you can only go darker.
G10 dying is incredibly easy and requires very few materials. All you will need is a bottle of Rit dye and boiling water.
Prep your scales by thoroughly cleaning them, making sure they're free of any oils or dirt that might be on them. The container you use to boil the water should be something that you won't mind losing, like a large soup can or another metal container that won't melt on the stove.
Start by boiling just water, adding a bit of dye once you begin to see steam. It's recommended to start with a smaller amount of dye to begin, as you can always add more later.
Next you'll want to tie a string around the scale or use a hook and dip them into the boiling water and dye. You can leave them in for a consistent color throughout the scale, or slowly dip and pull them out for a fade effect. If the color isn't as dark as you'd like, simply add more dye and dip the scales again until you've reached your desired color.
#4 9V Battery Anodization
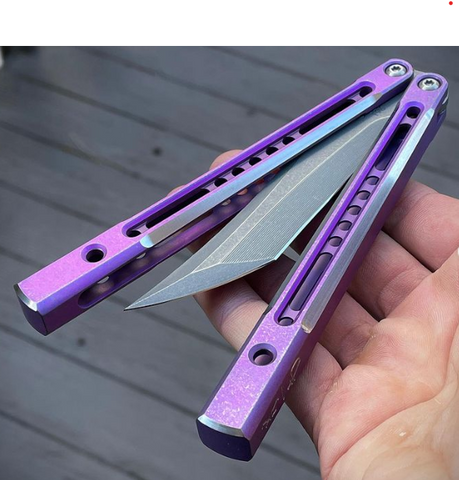
Everyone has seen someone’s tricked out titanium butterfly knife with fancy colors. Wouldn’t it be pretty sweet to do some of that coloring yourself?
It turns out that with a simple electrolyte bath and a few 9V batteries you can do some of your own fancy titanium anodizing. When people first start looking into anodizing they might shy away because it’s either too expensive or they’re nervous about the high voltages, but it is actually pretty easy to get single color ano’s using just a few 9V batteries and water with baking soda.
You will need a few extra materials you might not have handy, including some titanium wire (can find cheap surgical wire on ebay), a set of alligator clips, and some metal conductor as a ground (a metal kitchen utensil works just fine).
If the titanium you want to anodize is already colored, you will need to strip the ano off by either sanding or using a chemical like Whink rust and stain remover or Multi-Etch. If you're working with raw titanium you can skip this step and go right to the cleaning.
Cleaning the titanium and making the surface shiny is a crucial step, the ano will not come out evenly and will look splotchy if there are any imperfections. You can get a simple satin finish by either lightly sanding the titanium flats with high grit sandpaper, or roughing it up with a scotch brite pad.
For the electrolyte solution mix a spoonful or two of baking soda with distilled water in a container large enough to fit your titanium parts. You can create your power supply by daisy chaining 9 volt batteries together, the number you need depending on what color you want to achieve.
To hook everything together, connect the black wire to the negative end of the daisy chain and the red wire to the positive end. Connect the other end of the black/negative wire to the metal piece you're using for the ground, which then goes into the electrolyte solution.
Wrap the titanium wire around the piece you're anodizing, and clamp the wire with the red/positive lead. Make sure the titanium wire is securely attached to both the piece you're anodizing as well as the positive wire to make sure everything stays together.

Once you've done all the prep work the anodization is quite simple. While wearing gloves, dip the titanium piece you want anodized into the electrolyte bath, being careful not to contact the negative lead.
You will see the titanium start to bubble and change colors immediately. Let it sit in the bath for a few extra moments after the color stops changing to ensure the finish comes out as consistent as possible.
The color produced depends on the amount of voltage that goes to the piece, so make sure to check out a color chart to make sure you have the correct amount of batteries.
You may also want to start out with one less battery than you need, as you can always add extras to produce a different color. Using a lower voltage, however, will not change the color of a piece that has already been anodized at a higher voltage.

#5 Aftermarket Parts
Perhaps the easiest and most common thing people do to customize their balisong is buy and install aftermarket parts. There are tons of different options for many different models.
Scales, spacers, liners, full handles, reblades, and other various parts can be added or replaced on a balisong to make it how you want it. There are many different people that make aftermarket balisong parts, and you can often find some to fit the exact color scheme you may be looking for.
One of the great things about aftermarket parts is that you don’t need any special tools other than what you’d need to take apart your knife. Head over to our article on How to Disassemble your Balisong to learn more about how to take your balisong apart, and check out these 10 Balisong Mods that are Worth It for some recommendations.
Conclusion
There are several ways that you can customize your balisong without the need to send it out to get mod work done. Experimenting with customizing your knife yourself can be a lot of fun, and makes your knife much more unique.
As previously stated, make sure you're taking any and all safety precautions when working with any strong chemicals or high voltages, including wearing gloves, eye protection, and working in a well-ventilated workspace. If you aren’t comfortable trying any of these things by yourself, there are many very talented makers and modders on Instagram who can do all of these customizations and more.
As always, be safe and keep flipping!
DM me @poip._.sus on IG for any question you may have.